SOLIDWORKS PDM Professional Web2 Upgrade
The upgrade involves manually removing the existing installation of Web2 and installing the new version.
The following steps below were provided by SOLIDWORKS solution S-069296. If you want to reference this solution, you can find it on the SOLIDWORKS website.
Steps to follow:
Upgrading from Pre-2016 Web2 to 2016 SP0 or newer:
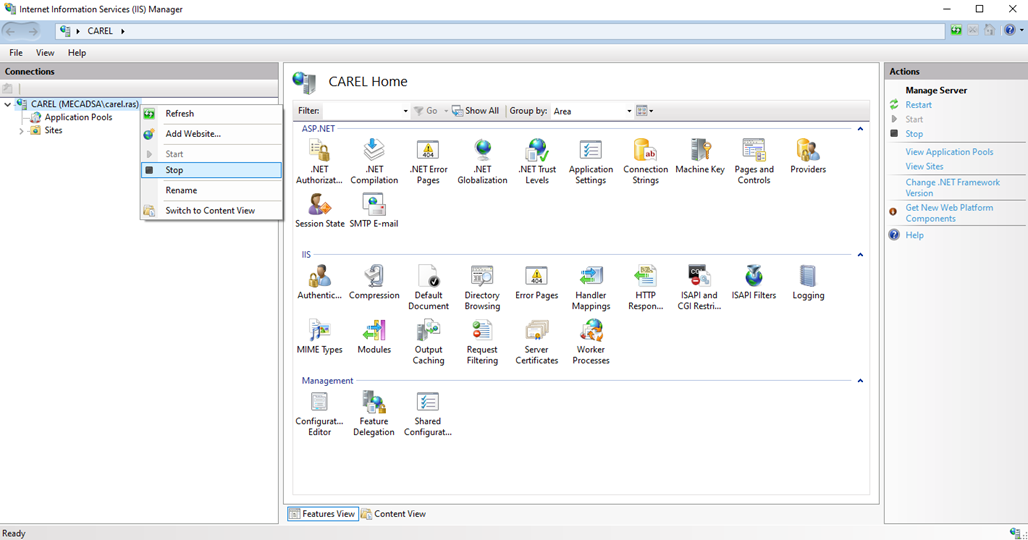
- Stop the Internet Information Server (IIS) service 'World Wide Web Publishing Service' (W3SVC).

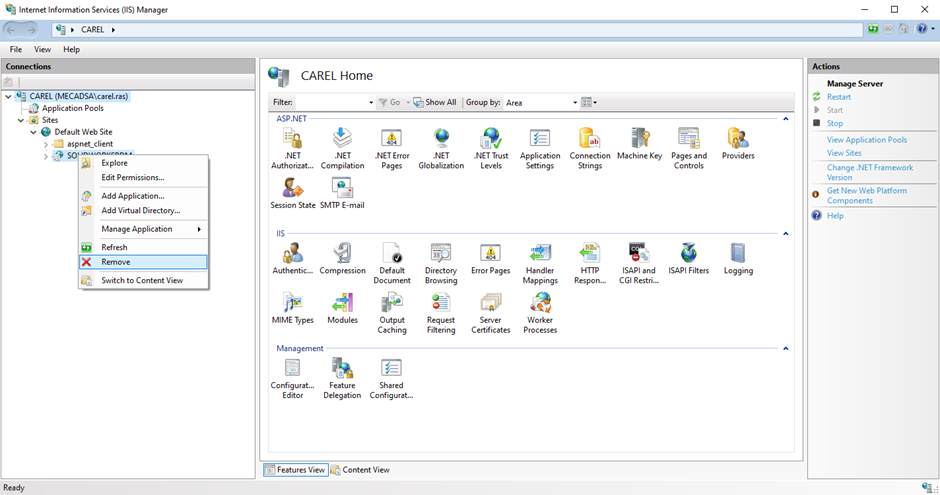
- Open IIS Manager, expand 'Sites', expand 'Default Web Site' and delete the previous Web2 application.

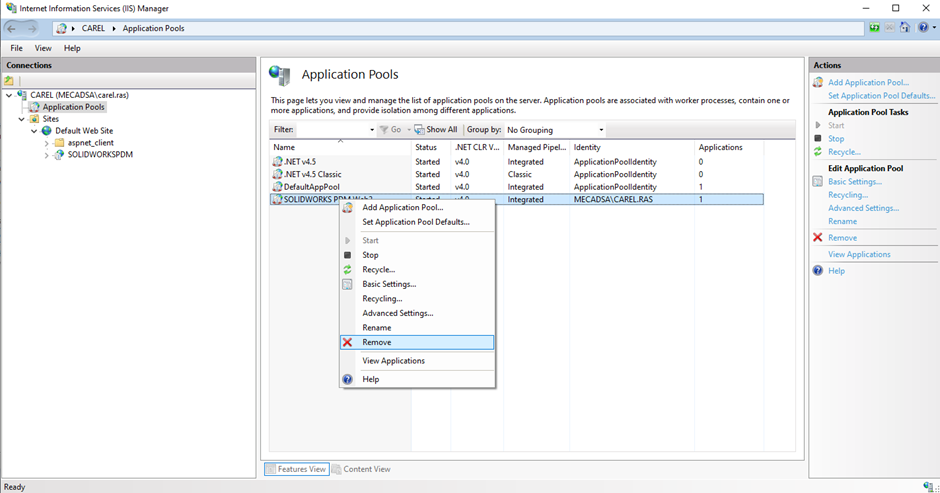
- Select 'Application Pools' and delete the old Web2 application pool.

- Delete the older Web2 server files (the files are found inside the folder containing the 'web.config' file and subfolders). You can keep a copy of the older 'web.config' file to see what modifications were made to the Web2 server settings previously.
- Right-click the web server name and select 'Start' to start the IIS server service.
- Install the version of Web2 by running the SOLIDWORKS PDM Server install from the setup media. The Web2 server install will automatically create an application pool named 'SOLIDWORKS PDM Web2' and an application named 'SOLIDWORKSPDM'.”
- Edit the 'web.config' file with the vault name(s) and other edits that were made to the previous version of the file. (Default file location is here:
'C:\inetpub\wwwroot\SOLIDWORKSPDM\Web2\'.
You can easily edit the 'web.config' file via the IIS manager by selecting the 'SOLIDWORKS PDM' application and double-click 'Application Settings'. - In the IIS manager, select 'Application Pools', right-click 'SOLIDWORKS PDM Web2' and select 'Advanced Settings'. Under 'Identity', enter the username and password of the currently logged-in Windows account (or enter an account that has logged in to the IIS server and access the local vault view at least once).
- SWPDM Web2 should now be ready to use. The default web address is: 'http://ServerName/SOLIDWORKSPDM/'.
Dater published: 15 November 2022
