
1. Disclaimer
MECAD Systems absolves itself of any backups created with the use of this document that fail or become corrupt. The responsibility lies with the client to ensure all backups of their PDM system are working correctly and are stored in the appropriate manner such that if there is a system loss that the backups are up-to-date and can be easily restored back to a working setup.
2. Backup Procedures
Please note that all three of the following components should be backed up to create a complete set of backups of your SOLIDWORKS PDM vault.
Backups should preferably be scheduled daily, during a time when vault and network usage is low. Allow enough time for the backup process to complete.
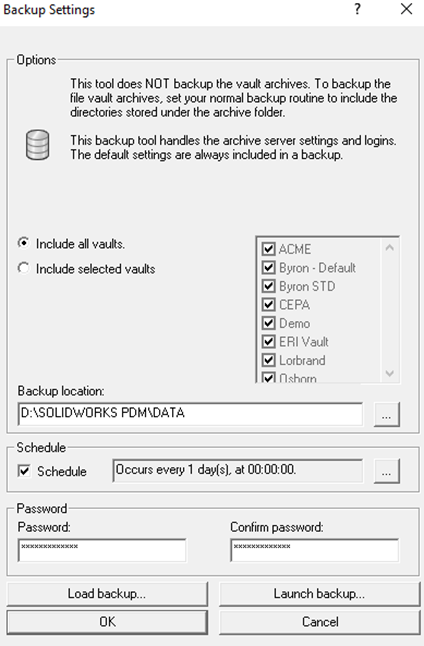
2.1. BACKUP ARCHIVE SERVER SETTINGS
- If Archive Server Configuration does not launch, it may already be running. Check the system tray icons.
- The password entered for the backup is only for security. It does not need to match any PDM related passwords.
STEPS TO FOLLOW:
- Launch the Archive Server Configuration
- Tools > Backup Settings
- Launch Backup can be used to create the backup immediately.
- Load Backup can be used to restore from a previous backup.
- This backup should not take more than a few seconds. 5min should be more than enough time.
2.2. BACKUP SQL DATABASES
2.2.1. Manual Backup
STEPS TO FOLLOW:
- Create a subfolder to which backup reports will be written.
- Reports can also be sent to an e-mail address.
- Both the vault database and ConisioMasterDb should be backed up.
- This backup should not take more than a few seconds to a few minutes at most. 10min should be more than enough time.
- Open the SQL Server Management Studio
- Right-click on the databases mentioned above > Tasks > Backup…
- Recommended settings:
- Backup Type: Full
- This can be set to differential to save space, but a full backup is required to do a complete restore of a database.
- Verify backup when finished
- Backup Type: Full
2.2.2. “Automatic Backup” of SQL Express
Please note that this is considered a workaround for a capability that does not exist in SQL Express, thus precautions should be made to ensure it is working as desired.
STEPS TO FOLLOW:
- Import the following text into a notepad file and modify as needed.
All underlined sections need to be replaced with the user’s specific database information and file paths.
SQLCMD -S "SQL SERVER\SQL INSTANCE NAME" -Q "BACKUP DATABASE ConisioMasterDb to DISK = '<PATH TO SQL BACKUP FOLDER>\ConisioMasterDB.bak' WITH INIT"
SQLCMD -S " SQL SERVER\SQL INSTANCE NAME " -Q "BACKUP DATABASE <NAME OF PDM DATABASE> to DISK = '<PATH TO SQL BACKUP FOLDER>\<NAME OF PDM DATABASE>.bak’ WITH INIT"
WHERE:
|
Command |
Definition |
Meaning |
|
-S |
Server Option - Identifies the instance of Microsoft SQL |
Identifies the instance of Microsoft SQL |
|
-E, -U, -P |
Authentication Options |
Specify the credentials that the SQL CMD must use to connect to the SQL Server (-E is default and does not need to be specified) |
|
-Q, -q, -i |
Location of the Input |
Identifies the SQL Database that will be backed up |
- Run this command through PowerShell using Windows Task Schedular.
- The above script will back up your ConsioMasterDB database as well as the PDM vault database creating one database backup file per database listed above.
2.2.3. Automatic Backups
STEPS TO FOLLOW:
AUTOMATIC BACKUPS ARE ONLY AVAILABLE TO SQL STANDARD & ENTERPRISE LICENSES
- Create a subfolder to which backup reports will be written.
- Reports can also be sent to an e-mail address.
- Both the vault database and ConisioMasterDb should be backed up.
- This backup should not take more than a few seconds to a few minutes at most. 10min should be more than enough time.
- Open the SQL Server Management Studio
- Navigate to the Management folder > Right-click on Maintenance Plans > Maintenance Plan Wizard
- Give the plan a name and set if you want a schedule for the backup to run (i.e. every week or every day at a specific time.) then click Next
- Check the box for Full or Differential backup type then click Next
- Full – Complete backup of the SQL databases selected
- Differential – The difference between the last backup and the current SQL database
It is recommended if you have a large database size that you run a separate maintenance plan in larger time increments for the full backup and then run the Differential backup more often to save space on your server.
To restore a SQL database, you require a FULL backup of the database.
- Under the General tab:
- Select the databases that you want to backup with the maintenance plan
- Note the above two mentioned databases that need to be included at minimum.
- Under the Destination tab:
- Select Create a backup file for every database and choose a location for where you want the backups to be placed.
- The default location is normally sufficient.
- Leave the Backup file extension as .bak
- Under the Options tab:
- Leave the backup compression as default
- Choose if you wish the backups to expire after a specific timeframe or date
- Select the checkbox for Verify backup integrity
- Click Next
- If you want a report written for the backup, then select the above created folder for the reports as the Folder Location or input an email address where you want the report to be sent. Click Next
- Review the maintenance plan and select Finish.
To test the maintenance plan, you can run it manually by right-clicking on the maintenance plan under the Maintenance Plan folder and clicking Execute. This will run the plan manually.
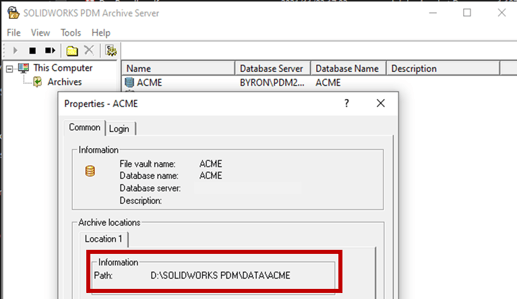
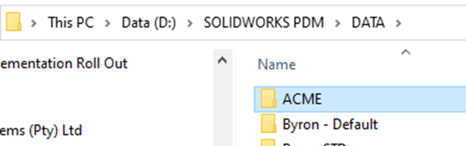
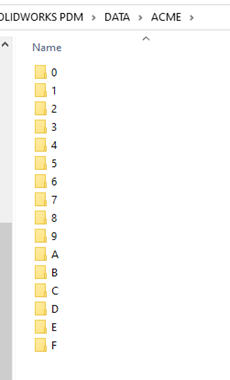
2.3. BACKUP ARCHIVES
WHERE TO FIND THE ARCHIVES:
Registry Key:
HKEY_LOCAL_MACHINE\SOFTWARE\SolidWorks\Applications\PDMWorksEnterprise\ArchiveServer\Vaults\ACME\ArchiveTable
Archive Server Configuration:
STEPS TO FOLLOW:
- Archives do not have a built-in automated backup tool. Windows Task Scheduler will be used for this.
- Create a Batch (.bat) file by copying this script to a Notepad file and editing accordingly:
- To create the .bat file, save the Notepad file as a .txt, go to the save location and rename the file from ArchiveBackup.txt > ArchiveBackup.bat
- This file can then be run with task scheduler.
All underlined sections need to be replaced with the user’s specific database information and file paths.
ROBOCOPY “<Archive Source Location>" "<Archive Destination Location>" /E /PURGE /V /R:0 /W:0 /TEE
WHERE:
|
Command |
Definition |
|
/E |
Copies subdirectories, including empty ones. |
|
/PURGE |
Deletes destination files and directories that no longer exist in the source. |
|
/V |
Produce verbose output, showing skipped files. |
|
/R:0 |
Retry 0 times. You can specify a different number; the default is 1 million. |
|
/W:0 |
Wait 0 seconds before retrying. You can specify a different number; the default is 30 seconds. |
|
/TEE |
Writes the status output to the console window, as well as to the log file. |
Archive backups can take a considerable amount of time to complete due to the size of the archives. This may take up to a few hours for exceptionally large archives folder sets.
3. Best practices
3-2-1 Rule:
- 3 copies
- 2 onsite
- One original data, one on anther pc/storage system.
- 1 offsite
- Disconnected is good practice here.
- 2 onsite
The options for offsite can be the following:
- NAS at a secondary location or office
- Cloud backups
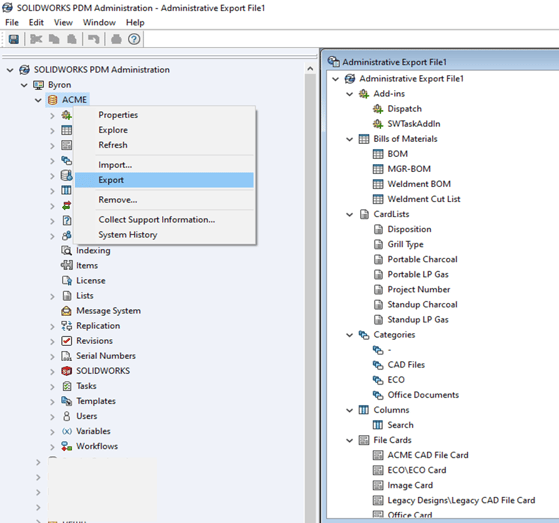
4. Additional Backup – Vault Configuration
To create a backup of your vault’s configuration:
Open the Administration Tool
- Right click on the vault name > Export
- Save the .cex file in the top left-hand corner
- Choose a loc/ation to save it to and give it a descriptive name.
Date published: 16/05/2022
Updated: 13/09/2022